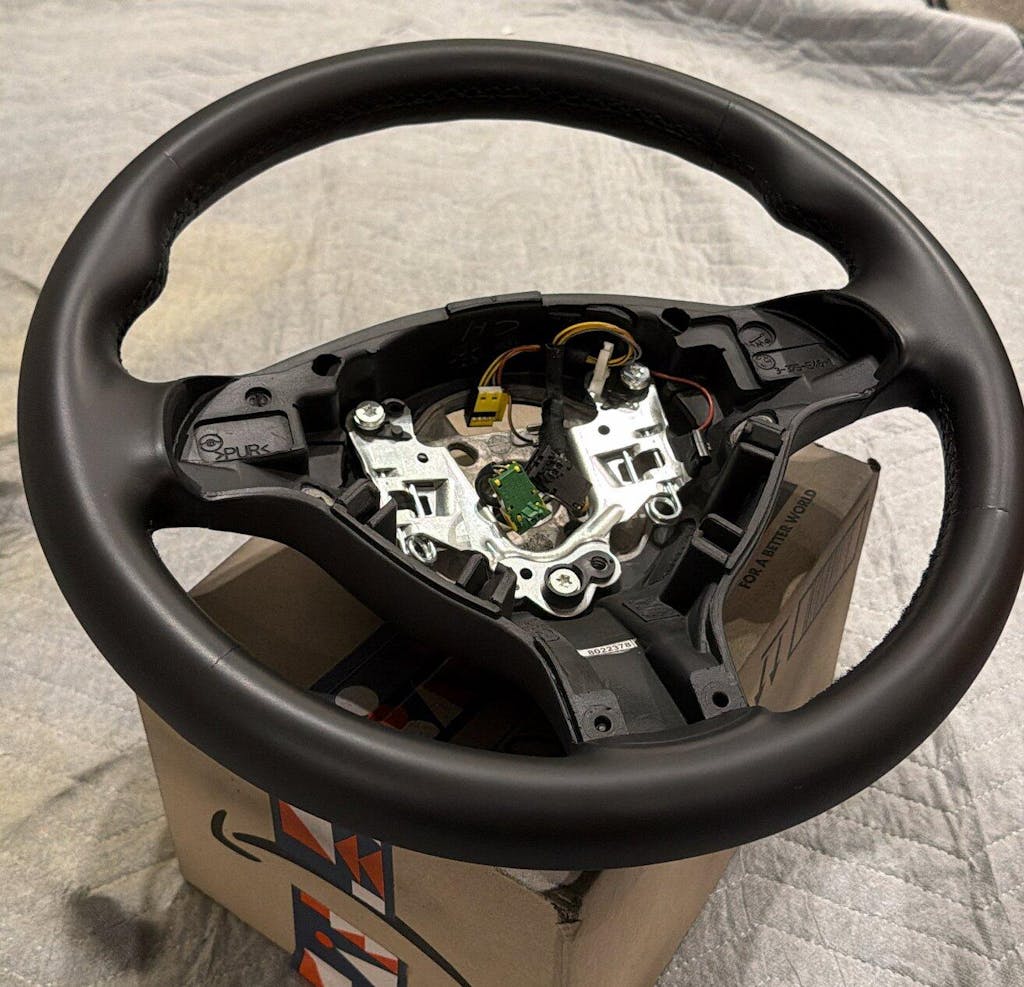


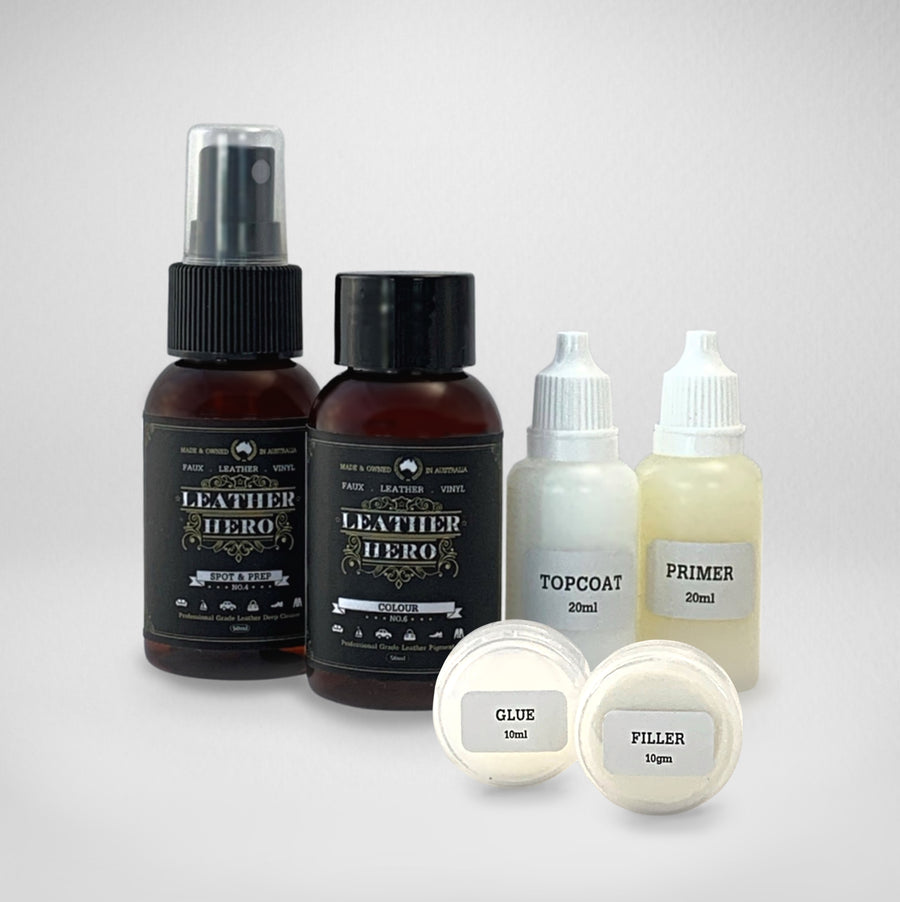
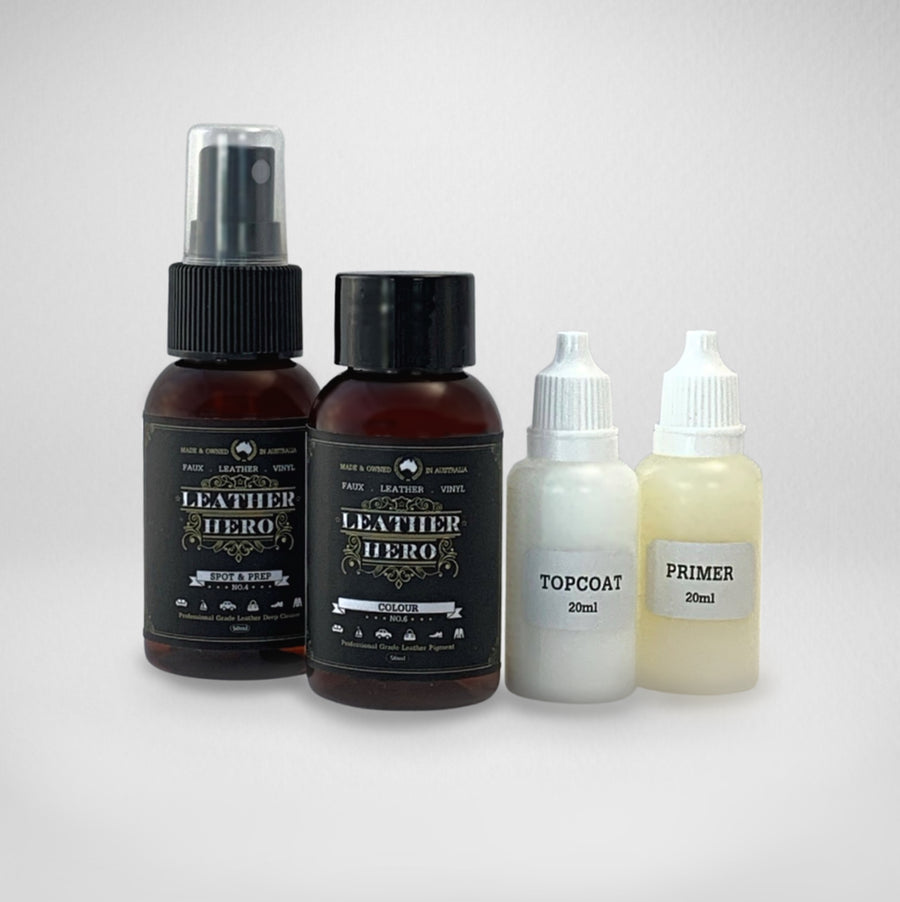


Steering Wheel Repair & Recolour Kit
Restores damage and colour wear on leather steering wheels. Same colour or a new one, in a few steps.
Steering Wheel Repair & Recolour Kit
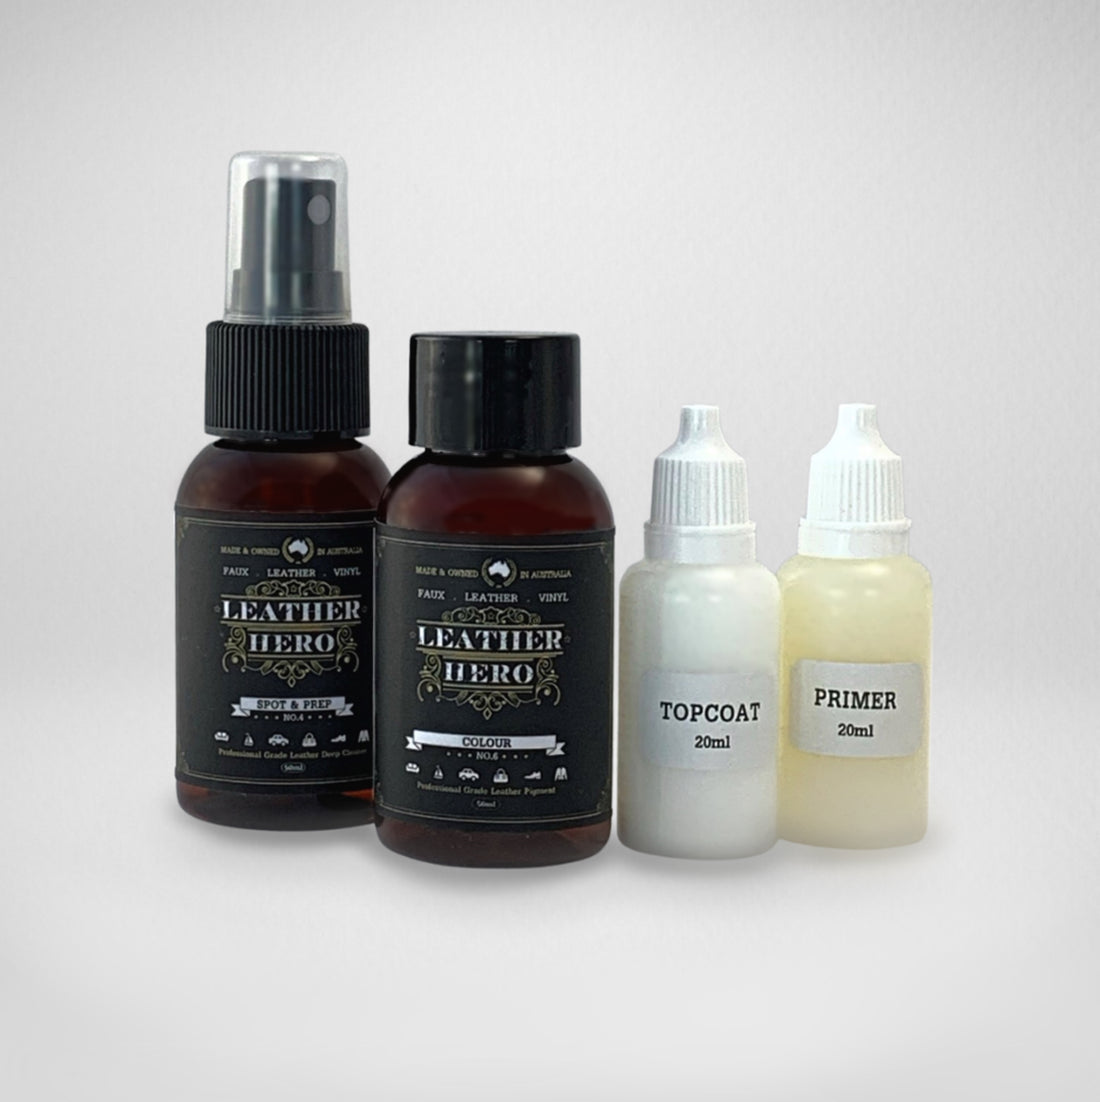
Could your steering wheel use a bit of TLC? This kit contains the essential products to restore colour wear and damage to your leather or vinyl steering wheel. In just a few steps, you can restore years of wear and tear. Change the colour to something new or restore the original colour and finish.
- Repair surface irregularities using glue and filler (Like A Pro Kit)
- Recoats with new leather coatings
- Same colour or a new colour
- Paint is satin finish
- Control the shine by choosing between Matte, Satin, Gloss or High Gloss topcoat. Note: Matte is best applied by spray gun
- Professional tannery grade system for pigmented leather
- Self leveling, refined finish
- Adheres to leather, vinyl and plastic parts (with best durability on leather)
- Touch dry in 1 hour, dry in 2 days and cured in 14 days
"Kits arrived and am very impressed. Have started working on the first steering wheel and the black is coming up trumps". Jack M, NSW
4 -5 steps
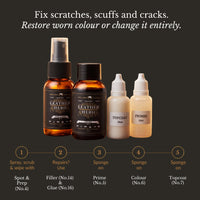
After cleaning and sanding, glue down any loose tags or tears (if needed) correct any textural irregularities with leather filler (if needed), sand to smooth and when your repair work is done, simply apply primer, colour and topcoat with a sponge. Allow drying between each thin coat to effectively build a refined showroom finish with full even coverage.
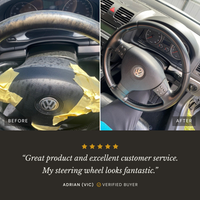
"Just a thanks to you guys for the great product and excellent customer service. My steering wheel looks fantastic". Adrian M, VIC

After Care
Be sure to take good care of the new coatings by removing the perspiration and skin oils that can damage both leather and leather coatings. The Leather Care Kit is ideal for car leather.
"Really impressed with the quality of this product and the help from the staff providing tips. My steering wheel looks and feels great as does my shifter. Take your time with the prep part and this comes out extremely well in the end"👍🏼😃
Looking for more colours?
Head to the Repair & Recolour Kit. The 50ml kit contains the same components and is available in 85 colours. Adjust any colour to match yours using Sample Pots.
Want to know more about the products? Read through the info on this page then head to the How To library to learn more about choosing your colour and topcoat and how to use the products.
Need accessories for your job? Here they are.
Want to see what other customers have done with this kit? Head to the Customer Before & After gallery.
Instructions: Print the Directions for Use, Tips and Details ![]()
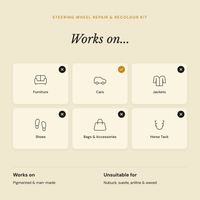
This kit is suitable for pigmented (painted/coated) leathers. Cars are upholstered with pigmented leather.
With reduced durability, it can also be used on man-made materials.
1) Work area
Lay down drop sheets to protect your work area and ensure good ventilation.
2) Surface Prep
Spray Spot & Prep (No.4) on one area at a time. Use a brush or green kitchen scourer to agitate into the grain. Use a cloth to wipe away dirt and grime from the leather. Repeat until the leather is thoroughly clean and free of soiling, oils, silicones, waxes and emollients.
3) Mask up
At this point, it is optional to tape up any areas that you do not wish to treat using masking tape.
4) Key the surface
Lightly sand the areas you intend to recolour. Usually 600-800 grit is ideal. Sanding helps to remove any loose or flaking coatings, smooth surface irregularities, and keys the surface to promote a good bond between the old coatings and new. When done, wipe over to remove dust.
For leather that is not damaged and does not require repairs, go to Step7
5) Glue
If your leather is damaged (surface pitting, rough texture or tears) use a tiny amount of Glue (No.15) to glue down any loose tags or coat the open edges and join them together. For tears, apply one layer of glue, wait until it comes semi-dry (tacky), then apply a second layer. Join edges and hold firmly for a few minutes or until dry. Masking tape can be used to hold the sides together until bonded. Keep the upper surface clean by wiping away any excess glue as you go. When completely dry, sand the area to remove or smooth any unwanted glue residue.
6) Fill
Conceal any repair joins or surface damage such as scratches, cracks and pits with Fill (No.14). To do this, use a spatula/palette knife or a sponge. First, filler can be tinted using some of the leather paint. This step is optional. Mix around 10% colour into the filler. Load a small amount of Fill (No.14) onto the underside of the spatula, lay the spatula almost flat and wipe across the repair site. Use light steady pressure to press a thin layer of filler into the hollows and use a gentle sweeping action to feather the edges and minimise unwanted ridges of filler. If using a sponge, apply filler using a combination of wiping and dabbing motions. Allow to dry before applying further thin layers as needed. To mimic leather grain, try using a stippling (dabbing) technique for your last layer or two. This can create soft peaks that resemble leather grain when lightly sanded after curing. Allow to air dry or use the sun or a hair dryer to speed drying time. In some cases, it is prudent to allow overnight drying. When dry, smooth using sandpaper.
7) Prime
Using an applicator sponge, apply an even coat of Prime (No.5) and gently push it into the grain of the leather. Allow drying. Apply a second coat then allow drying.
If you are not mixing your own colour, go to Step 9
8) Mix colour
If you intend to mix your own colour and have purchased extra colours for tinting the main colour add a drop, a few drops or a dash of colour at a time. Shake or stir to mix. If your colour is likely to require a lot tint, empty the base colour into another vessel for mixing (eg, mixing bowl, plastic bottle or plastic cup). Test the new colour before proceeding. To do this apply a 1cm spot, dry it with a hair dryer (at 30cm) then decide if or how to adjust your colour. Clean off your test colours as you go as they are easily remove)d when fresh. When satisfied with the colour move on to the next step.
If you want a Satin, Gloss or High Gloss result, go to Step 10.
9)Colour
Use an applicator sponge to apply Colour (No.6) evenly over the repair site or project. If finishing a repair, wipe the sponge over the surface and blend the edges using fast, light, feathered strokes. If doing a full recolour, use even strokes to ensure even coverage. Gently push the first coat of paint into the grain and any crevices. Wipe excess product from seams to avoid pooling. The first coat will not look neat or even. Allow to dry and repeat until your desired coverage is achieved. Several thin coats are preferable. There is no 'normal' number of coats as each piece of leather is different, some colours build overage faster than others, and the various application methods also impact the number of coats needed. If you are changing colours, it is likely that more coats will be needed than if you are refinishing in the same colour. Mild sunshine or a hair dryer can be used to speed drying between each coat.
If possible, allow overnight drying after a 2-3 coats of colour. If not, use a heat source to promote faster curing. When you are happy with the colour coverage, allow another 2 days drying or dry manually before applying Topcoat. Avoid soiling and skin contact during the refinishing process.
10) Topcoat
Apply topcoat using a sponge. Use long even strokes to achieve full coverage. Allow drying. Apply a second and final coat. Allow to dry. Dulling Agent (sold separately) can also be added to Topcoat (No.7) to make it less shiny if needed. If hand application leaves a streaky finish, try mixing approximately 10% Colour (No.6) into your second coat of Topcoat.
Tips
Avoid touching the leather between coats during the restoration process as body oils could compromise coatings adhesion.
There is no 'normal' number of coats as each piece of leather is different and some colours build coverage faster than others.
Mild sunshine, a room heater or a hair dryer can be used to speed drying between each coat.
Avoid using Spot & Prep (No.4) or other cleaners (including water) on new coatings until they are cured (14 days).
If you find any blemishes, grit or hair in your coatings, allow a couple of days drying (or speed dry with a hair dryer) then lightly sand with 800 grit sandpaper. Follow with additional coating over the affected area.
If at any time, you see coatings disturbance during the process (for example, Topcoat appears to remove some colour), the coatings are not dry yet. Allow further drying.
If leather filler is slow to dry, it may have been applied too thickly. Thin layers are best.
Maintenance
Touch up scuffs and general surface wear using the same process; clean then coat. Best results are generally achieved by treating complete areas.
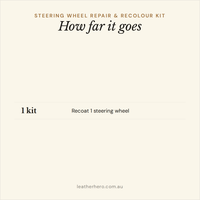
1 kit is usually enough to recoat 1 steering wheel.
Coverage estimates are approximate. Your job may require more ore less product.
Ideal for: Repairing and recolouring a vehicle steering wheel.
Use with: The Leather Hero range of products
Application schedule: As needed.
Application method: By hand using a sponge or brush or by spray gun. Primer must be applied by hand.
Best accessories: Microfiber cloth, applicator sponge, sandpaper, brush, palette knife, gloves.
Instructions: On the bottles, under the How To tab on this website, under Directions For Use tab on this page.
Drying time: Touch dry in 1 hour, dry in 2 days and cured in 14 days. Leather filler may take more than 1 hour to dry.
Time before use: 2 or more days where possible.
Available separately: Yes, all products are available for purchase separately.
Tips: See Directions For Use.
Test before use: Test colour and Topcoat in a hidden location before use. If adjustments are required, see Sample Pots.
Storage: Do not store. The dropper bottles and filler pots are not air tight enough for long term storage. Use your kit within 2 weeks of delivery.
If possible, allow at least 48 hours drying time before using your steering wheel again. It takes 14 days for the coatings to fully cure. Extra care is recommended during this time to avoid scrapes or coating disturbance. After 7 or more days of drying, condition with Nourish (No.2) and protect with Protect (No.3). When dry, an optional step is to buff lightly to render a beautiful feel and finish.
Don't Take Our Word For It
See what customers say about this product
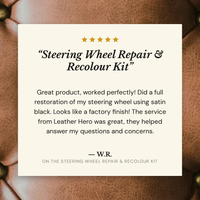
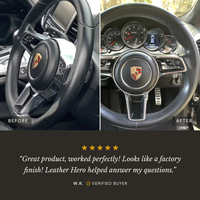
Great product, worked perfectly! Did a full restoration of my steering wheel using satin black. Looks like a factory finish! The service from Leather Hero was great, they helped answer my questions and concerns.


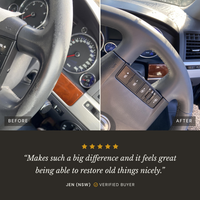
The steering wheel on my old Volvo was very worn with much of the original colour was lost exposing the ‘black’ leather base. This kit was fantastic at restoring the original colour. The instructions were easy to follow (on-line) with each step detailed exactly. It is not quick but the results are very impressive and I would highly recommend to anyone anting to recolour or restore a worn steering wheel. Highly recommended.
I purchased the 'Pro" steering wheel repair kit. I must admit I found the instructions quite confusing, and the website difficult to navigate to find the pertinent information, (maybe just me) however Leanne from Leather Hero was quick to respond and assist. I have to say, despite my trepidation (I thought I was going to ruin my steering wheel completely), it actually looks so much better. My advice is, when you get the kit, if you're not completely sure with the steps, contact Leather hero and ask them. Definitely recommend the product, just take your time and ensure you understand the instructions.
I was going to buy some vinyl spray from the auto store but a full can cost $23 and I only needed a small amount, so I did done searching and found this kit. It includes everything you need to fill and re-colour faded or damaged steering wheel material. You must supply your own 800 grit sandpaper, however. Excellent online instructions, that are time saving and explain what you need to do. Kit contains sufficient product for a string wheel repair with a fair amount spare of you only have a small job... But you can use it elsewhere too... Unlike a big can of vinyl spray paint. I am happy with the results, and I'm a first timer.
Got the Leather Hero Repair Kit as it was better value than some of the other advertised. Kit came with a instructions to get the instructions on the website. From there I learned I needed to have a scrubbing brush (had one already which was fine), fine grain sand paper and applicators - either paint brush or sponge applicator - it was a bit vague at that point. I think the instructions on the web are fine if you know what you're doing. I didn't. It took me a couple of goes of trial and error and in the end I needed my car for the weekend so I ended up rushing the last attempt. To my surprise, the steering wheel came out looking much better than I thought it was going to. I'm a bit pedantic so I want to go back and give it another go at some point in the future to address some very minor blemishes that I didn't get quite right. But the main points I was trying to fix were definitely addressed. So 5 stars for the product itself. But if it's your first go, I'd suggest reaching out to someone with a bit of experience to get a bit of detail on how to do the job right the first time rather than just relying on the online instructions. PS - I have a before and after photo but couldn't upload them for some reason
I used this kit on 2 of my car and wwas so impressed with how they came up. Still have product left if I have to do it again. Highly recommend.
Great product, worked perfectly! Did a full restoration of my steering wheel using satin black. Looks like a factory finish! The service from Leather Hero was great, they helped answer my questions and concerns.
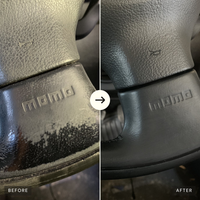
My old & worn Momo steering wheel is now looking like new. Colour matching the dark grey on the two-tone steering wheel was easy with the light grey & black paints mixed a bit at a time. Very happy with this product & the service from these guys.
Awesome products, both steering wheels turned out better than expected, would highly recommend this products.
I think my steering wheel looks amazing considering this is the first time I’ve had anything to do with leather. I’m so impressed with myself that I want to do the rest of it now
Completely restored my steering wheel. Got the best results with an air brush
I’m very pleased with this product, my steering wheel came out really well
Product was easy to use. Excellent result. Steering wheel looks like new. Very happy with result
Just a thanks to you guys for the great product and excellent customer service. My steering wheel looks fantastic
worked well just as described and will purchase again.
Had a small chip in the leather on my steering wheel and was able to do a DIY repair and it looks pretty good
Applied the coats by following the process, looks great. The real test will be to see how it wears.