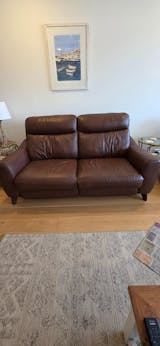
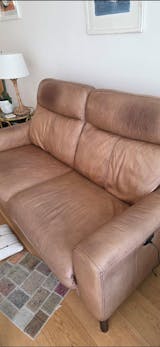
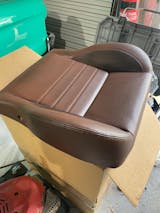
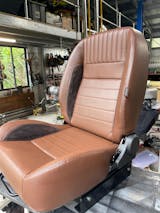
Leather Repair & Recolour Kit - Redwood Recolouring Leather Hero Australia

Leather Repair & Recolour Kit - Redwood

$41.95 Sale Save
Size 50ml
Topcoat Satin
Repair None

Only 0 left in stock

A pro-grade repair and refinishing system for pigmented (painted/coated) leathers.

This best seller is the one you need if you want to cosmetically repair surface damage such as scratches, holes, pet damage, rips, scuffs, cracks, and general wear and tear. It's also the kit you need if you want to correct colour problems like stains and discolouration. Use the same colour or change it up with a new one. Apply by hand with a sponge or use a spray gun. No special experience needed. 

For sofas, cars, apparel, bags and lots of other leather

Calling all DIYers. You'll love the professional results you can achieve with this premium leather repair and recolour kit. From small touch-ups in your car to changing the colour of an occasional chair or recolouring an entire lounge suite, this kit enables showroom results. 

A tannery grade system

Our refinishing system is the real deal. It echoes the process used on your pigmented leather in the tannery. No compromising shortcuts, it includes primer for maximum adhesion (a key durability factor), professional grade leather paint plus a separate bottle of performance tested clear topcoat. By using the same layering process as the original manufacturer, a beautiful, wear-resistant transformation is possible. It's flexible and self-sealing which means that it won't rub off onto your clothes. 

Customise your kit

Customise your kit by selecting the size you need, the colour you like and the level of shine in your topcoat. You can also add glue and white leather filler (can be tinted with your leather paint) to your kit if your job has surface imperfections and cosmetic bingles that need to be repaired before doing the colour work. (Selected combinations).

Colour & sheen

The leather paint has a satin finish so it suits most cars and furnishings. You can make it flatter by adding Dulling Agent (No.30) or increase the shine by using Topcoat Gloss or High Gloss. Offering full coverage, it's possible to cover the old coatings with the same, similar or different colour. 

Get ready to take a bow to the tune of applause from your family and friends. 

Want to know more about the products? Read through the info on this page then head to the How To library to learn more about choosing your colour and topcoat and how to use the products.

Need accessories for your job? Here they are.

Want to see what other customers have done with this kit? Head to the Customer Before & After gallery. 

Instructions: Print the Directions for Use, Tips and Details  

Suitable for pigmented (coated/painted) leather.

Can also be used on aniline and semi-aniline leathers if a permanent change from 'unfinished' to 'finished' leather is desired. This may be the case when fading, marks and stains are present and the protective and coverage benefits of full coatings are welcome.

Can be used on man-made leathers although, typically with reduced durability.

50ml - 1 repair area approx 40cm x 40cm, lots of small touch-ups, 1 armrest, 1 standard sofa seat panel, 1-2 car seat panels, 1 handbag,

125ml - 2 standard sofa seat panels, 1 car seat, 1-2 sofa armrests

250ml - 3 standard sofa seat panels, 2 car seats, 1 small armchair, 3-6 bar stools or dining chairs

500ml - 1 recliner armchair, 2 small armchairs, 2 front car seats plus other areas, lots of dining chairs

1L - 1 standard 2.5-3 seater sofa, 1 car interior

2L - 1 standard 5 seater sofa

Note: Coverage estimates are approximate. Coverage is affected by a number of variables such as the type and condition of your leather, the colour, whether you are changing colours or touching up the original colour and the method of application. Your job may require more or less of one or more kit component.

1) Work area
Lay down drop sheets to protect your work area and ensure good ventilation.

2) Vacuum
Vacuum to remove pet hair, dust and loose particles.

3) Surface Prep
Spray Spot & Prep (No.4) on one area at a time. Use a brush to agitate into the grain. Use a cloth to wipe away dirt and grime from the leather. Repeat until the leather is thoroughly clean and free of soiling, oils, silicones, waxes and emollients.

4) Key the surface
Lightly sand the areas you intend to recolour. Usually 600-800 grit is ideal. Sanding helps to remove any loose or flaking coatings, smooth surface irregularities, and keys the surface to promote a good bond between the old coatings and new. When done, wipe over to remove dust.

For leather that is not damaged and does not require repairs, go to Step 7.

5) Glue
If your leather is damaged (cat scratches or tears) use a tiny amount of Glue (No.15) to glue down any loose tags or coat the open edges and join them together. For tears, apply one layer of glue, wait until it comes semi-dry (tacky), then apply a second layer. Join edges and hold firmly for a few minutes or until dry. Masking tape can be used to hold the sides together until bonded. For larger rips (greater than 3cm), try backing the hole with a large patch of mesh, silk, fabric, leather, or vinyl. Glue the underside edges of the rip to the backing (not the entire area as the glue may create a stiffened area) and hold or tape in place whilst curing. Keep the upper surface clean by wiping away any excess glue as you go. When completely dry, sand the area to remove or smooth any unwanted glue residue.

6) Fill
Conceal any repair joins or surface damage such as scratches, cracks and pits with Fill (No.14). To do this, load a small amount of Fill (No.14) onto the underside of the spatula, lay the spatula almost flat and wipe across the repair site. Use light steady pressure to press a thin layer of filler into the hollows and use a gentle sweeping action to feather the edges and minimise unwanted ridges of filler. Allow to dry before applying further thin layers as needed. Allow to air dry or use the sun or a hair dryer to speed drying time. In some cases, it is prudent to allow overnight drying. When dry, smooth using sandpaper. For larger repairs, a hand-held mini power sander can be used with caution. To mimic leather grain, try using a stippling (dabbing) technique for your last layer or two. This can create soft peaks that resemble leather grain when lightly sanded after curing.

7) Prime
Using an applicator sponge, apply an even coat of Prime (No.5) and gently push it into the grain of the leather. Allow drying. In high traffic areas such as seat cushions and armrests or side bolsters in cars, apply a second coat then allow drying.

Note: Engage a helper to hold cushions apart or use dowl to hold them apart whilst they are being coated and dried. This product is designed to stick. Ensure freshly coated areas are dry before allowing newly coated faces to touch.

If you are not mixing your own colour, go to Step 9.

8) Mix colour
If you intend to mix your own colour and have purchased extra colours for tinting the main colour add a drop, a few drops or a dash of colour at a time. Shake or stir to mix. If your colour is likely to require a lot tint, empty the base colour into another vessel for mixing (eg, mixing bowl, plastic bottle or plastic cup). Test the new colour before proceeding. To do this apply a 1cm spot, dry it with a hair dryer (at 30cm) then decide if or how to adjust your colour. Clean off your test colours as you go as they are easily removed when fresh. When satisfied with the colour move on to the next step.

If you want a Satin, Gloss or High Gloss result, go to Step 10.

9) Adjust shine
If you want a Matte result, add 5%-10% Dulling Agent (sold separately) to the Colour (No.6). More can be added if desired. Test as you add. Apply a 1cm spot, dry it with a hair dryer (at 30cm) then decide if more Dulling Agent is needed to achieve a good match with the original finish or to achieve a level of shine that is right for your job. Dulling Agent can also be added to Topcoat (No.7) if needed.

10) Colour
Use an applicator sponge, roller or spray-gun to apply Colour (No.6) evenly over the repair site or project. If finishing a repair, wipe the sponge over the surface and blend the edges using fast, light, feathered strokes. If doing a full recolour, use even strokes to ensure even coverage. Gently push the first coat of paint into the grain and any crevices. Wipe excess product from seams to avoid pooling. The first coat will not look neat or even. Allow to dry and repeat until your desired coverage is achieved. Several thin coats are preferable. There is no 'normal' number of coats as each piece of leather is different, some colours build overage faster than others, and the various application methods also impact the number of coats needed. If you are changing colours, it is likely that more coats will be needed than if you are refinishing in the same colour. Mild sunshine or a hair dryer can be used to speed drying between each coat. Again, hold cushions apart whilst they are being coated and dried.

It's recommended that you allow a few days for big projects like recolouring a sofa. After your first 1-2 coats of colour, give the new coatings a day or 2 to dry before proceeding with the next few coats. When you are happy with the colour coverage, allow another 2 days drying before applying Topcoat. Avoid soiling and skin contact during the refinishing process.

11) Topcoat
Apply topcoat using a sponge, roller or spray-gun. Use long even strokes to achieve full coverage. Allow drying. Apply a second and final coat. Prioritise high traffic areas. Allow to dry. Dulling Agent (sold separately) can also be added to Topcoat (No.7) to make it less shiny if needed. Reminder to prevent freshly coated faces touching until they are dry. Note: Matte topcoat is best applied with a spray gun. If hand application leaves a streaky finish, try mixing approximately 10% Colour (No.6) into your second coat of Topcoat.

Tips

Avoid touching the leather between coats during the restoration process as body oils could compromise coatings adhesion.

There is no 'normal' number of coats as each piece of leather is different and some colours build coverage faster than others.

Mild sunshine, a room heater or a hair dryer can be used to speed drying between each coat.

Avoid using Spot & Prep (No.4) or other cleaners (including water) on new coatings until they are cured (14 days).

If you find any blemishes, grit or hair in your coatings, allow a couple of days drying (or speed dry with a hair dryer) then lightly sand with 800 grit sandpaper. Follow with additional coating over the affected area.

If at any time, you see coatings disturbance during the process (for example, Topcoat appears to remove some colour), the coatings are not dry yet. Allow further drying.

If leather filler is slow to dry, it may have been applied too thickly. Thin layers are best.

Maintenance
Touch up scuffs and general surface wear using the same process; clean then coat. Best results are generally achieved by treating complete areas. For example, the whole seat cushion rather than just a spot or all seat cushions rather than just one.

After care
Allow at least 48 hours drying time before using your leather again. It takes 14 days for the coatings to fully cure. Extra care is recommended during this time to avoid scrapes or coating disturbance. After 7 or more days of drying, condition with Nourish (No.2) and protect with Protect (No.3). When dry, an optional step is to buff lightly to render a beautiful feel and finish.

50ml Kit
This kit is suitable for approximately 1 armrest, 1-2 car seat panels or 1 handbag and includes:
50ml Leather Paint
50ml Spot & Prep cleaner and prep solution
20ml Primer
20ml Topcoat
Optional inclusions are:
10gm Filler & 10gm Glue

125ml Kit
This kit is suitable for approximately 2 armrests, 1 car seat, 1-2 sofa cushions and includes:
125ml Leather Paint
250ml Spot & Prep cleaner and prep solution
50ml Primer
50ml Topcoat
Optional inclusions are:
20gm Filler & 20gm Glue
50gm Filler & 50gm Glue
250gm Filler

250ml Kit
This kit is suitable for approximately 3 standard sofa seat panels, 2 car seats, 1 small armchair, 3-6 bar stools or dining chairs and includes:
250ml Leather Paint
250ml Spot & Prep cleaner and prep solution
125ml Primer
125ml Topcoat
Optional inclusions are:
20gm Filler & 20gm Glue
50gm Filler & 50gm Glue
250gm Filler

500ml Kit
This kit is suitable for approximately 1 recliner armchair, 2 small armchairs, 2 front car seats plus other areas, lots of dining chairs and includes:
500ml Leather Paint
500ml Spot & Prep cleaner and prep solution
125ml Primer
250ml Topcoat
Optional inclusions are:
20gm Filler & 20gm Glue
50gm Filler & 50gm Glue
250gm Filler

1L Kit
This kit is suitable for approximately 1 standard 2.5-3 seater sofa, 1 car interior and includes:
1L Leather Paint
500ml Spot & Prep cleaner and prep solution
250ml Primer
250ml Topcoat
Optional inclusions are:
20gm Filler & 20gm Glue
50gm Filler & 50gm Glue
250gm Filler

2L Kit
This kit is suitable for approximately 1 standard 5 seater sofa and includes:
2L Leather Paint
1.5ml Spot & Prep cleaner and prep solution
500ml Primer
500ml Topcoat
Optional inclusions are:
20gm Filler & 20gm Glue
50gm Filler & 50gm Glue
250gm Filler

Ideal for: Repairing and recolouring pigmented (painted/coated) leather or any leather project where new coatings are needed.

Use with: The Leather Hero range of products

Application schedule: As needed. Low impact areas may never need recoating. High impact zones may show wear and tear with use. Maintain the affected areas to correct and protect your leather structurally and aestheticly throughout its usable life.

Application method: By hand using a sponge, brush or foam roller or by spray gun. Primer must be applied by hand.

Best accessories: Microfiber cloth, applicator sponge, sandpaper, brush, palette knife, gloves.

Instructions: On the bottles, under the How To tab on this website, under Directions For Use tab on this page.

Drying time: Touch dry in 1 hour, dry in 2 days and cured in 14 days. Leather filler may take more than 1 hour to dry.

Time before use: 2 or more days where possible.

Available separately: Yes, all products are available for purchase separately.

Tips: See Directions For Use.

Test before use: Test colour and Topcoat in a hidden location before use.

Storage: Store in a dark, dry place with the lids on tight. Avoid bacterial contamination.

Results: Each piece of leather is unique. There are many makers of leather using a vast array of tannery treatments to create leathers with different characteristics. In optimal circumstances, this kit is capable of producing results that last for many years. That said, results and durability vary. The type, quality and condition of the leather, whether the full and correct process was used when applying the products, the amount and type of use the leather receives and the amount and type of leather care applied after repairing and recolouring all impact results and durability. The products are designed to let you restore and maintain the colour coatings on your leather as needed for the life of the leather.

Buy it with


Repair & Recolour

Enjoy incredible results when you repair surface imperfections and refinish your leather with this pro-grade kit. When accidents happend and times takes a toll, recoat you sofa, car interior, handbag, and much more.

With around 85 beautiful colours to choose from, you've found the largest range of tannery grade leather colourants in Australia.

5 steps to a showroom finish

Clean, Sand, Prime, Colour and Topcoat. No tools needed.

Replenish old, damaged coatings with fresh new ones. This process echoes the original tannery finish and the kit gives you the gear you need to keep your leather looking beautiful.

Suitable for pigmented (painted/coated) leathers, the products are safe, durable, and easy to touch-up as needed. Simply amazing results await!

“I am absolutely delighted with the result. Our 32 year old lounge looks loved again 😊I have just ordered the care pack to keep  it looking good”

Debra, NSW

Customer Reviews

Based on 88 reviews
93%
(82)
3%
(3)
1%
(1)
2%
(2)
0%
(0)
T
Tania
Caramel Colour was not Caramel

Caramel is more like English Mustard (yellow)

r
ross delaney
Rejuvenated our loved lounge

Our lounge was at a point where we felt. We had to replace it due to the wear and stains on the leather but we could not find a new style that we liked as much. The hero treatment has brought our lounge back to new and we are so happy that we did not have to replace it with something we did not like nearly as much

T
Toni Trott
Not perfect but very pleased with the results on my recliner

I had a badly worn dark coloured recliner that needed patching, a hole stitched and lots of cracks refilled. The kit worked well, however I think for darker colours, maybe the filler and glue should use a different base instead of white sort of how they tint paints in hardwares. Even though I added some Ruby dye to the filler, it took a lot of coats to blend the resulting pink coloured filler in with the rest of the leather. The repaired parts are still a bit light but now I can use the chair without having to cover it up. Saved me having to spend $2,400 AUS for a new chair so well worth the cost of the kit.

K
Kruss Russell
Reclining swivel chairs

Had to take all parts apart but well worth the effort. Best to overdue the prep stages for best results.

L
Leonie S
Went really well

I purchased a repair kit for my leather car seat. The repair has gone really well