How to restore aniline leather
3 Options
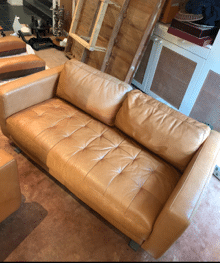
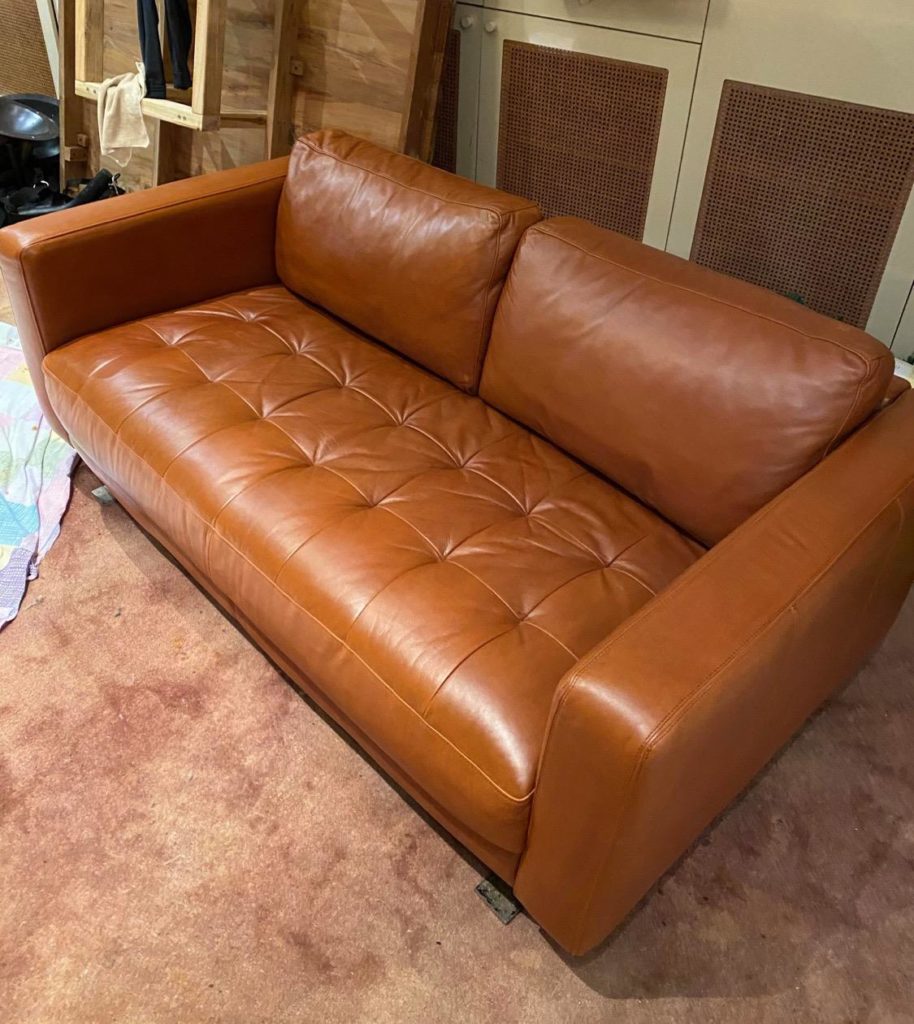
If your aniline leather is faded from UV exposure and is marked with stains, this guide will help you select a restoration approach and link you to the products you need. These methods not only apply to furniture but to lots of other aniline and semi-aniline leather items.
To find the solution that best suit your needs, think about the following:
- Are there marks, stains and imperfections that you'd like to disguise?
- How much coverage do you want?
- How much do you want to preserve the aniline look (dyed, uncoated, subte mottling)?
- Are filled repairs needed to correct a rough surface or tears?
Clarify you priorities then review your 3 options:
1) Full coverage using a Repair & Recolour Kit
2) Sheer coverage enhanced with dyes using an Aniline Restoration Kit
3) Transparent dye stain and topcoat using Aniline Dye Stain and Topcoat
Option 1: Full coverage
If your job requires repairs to tears or scratches (using glue and filler) and/or your goal is to completely cover stains and to unify the colour, refinishing with a Repair & Recolour Kit may be your best option. Using a leather paint system permanently changes the leather from aniline (uncoated) to pigmented(coated). If you'd like to avoid UV fading, this approach may be best as dyes are not as light fast as paints and may show some fading after a few years. Some Leather Hero colours are a blend of paints with a small amount of dyes. They are prefixed with the word 'Aniline' (meaning dye). These blends give a somewhat semi-aniline look as the dyes add vibrance and colour intensity. This system includes 5 steps and leaves a protective finish on the surface. It will not rub off onto clothing.


When to use a Repair & Recolour Kit
When there are marks and stains and you want to cover them completely
When you need to use leather filler to repair scratches, tears and holes
When you are comfortable with changing the finish to a pigmented one
When maximum longevity is a priority
When you want to change colour, whether darker or lighter
When UV light is abundant and you want to avoid fading. In this case, you would choose a solid monochromatic colour, not an ‘aniline’ colour (because dyes are prone to fading; pigments(paints) are not)
The products
You'll need a Repair & Recolour Kit (products also available separately).
1) Spot & Prep (No.4) - Leather spot remover & surface prep
2) Sandpaper - 600-800 grit
3) Prime (No.5) - Leather primer
4) Colour (No.6) - Leather paint
5) Topcoat (No.7) - Leather topcoat & sealer
Optional: Dulling Agent (No.30). Scroll down for more info on this product.
5 steps
To recolour leather:
1) Clean with prep solution
2) Sand to key the surface
3) Apply primer
4) Apply thin coats of leather colour by sponge or spray-gun until coverage is achieved
5) Seal with protective leather topcoat
For detailed instructions go to 'How to Recolour Leather', the 'Directions for Use' tab on the Repair & Recolour Kit product page and visit the Customer Before and Afters Gallery to view jobs completed with this system.
Option 2: Sheer coverage enhanced with dyes
The Aniline Restoration Kit is a 3 step system that renders a semi-aniline type finish. The dye stain penetrates into the leather where it boosts and balances the colour. It also blends the appearance of marks and stains. Choose a colour that is similar to the darker areas to make stains less eye catching. The colour cream contains paints, dyes and resins. It gives semi-opaque coverage which lightly covers stains, helps to unify the overall look and leaves a pleasing, protective finish. This is our most popular restoration kit for aging aniline and semi-aniline leathers. The finish is self-sealing and does not rub off onto clothing. As wear happens, it is super easy to refresh the high traffic areas as needed. For extra durability, apply 2 coats of Topcoat (No.7) in Satin or Gloss finish. This system is not suitable for use over leather filler.
For more information on this method, head to 'How to use the Aniline Restoration Kit' to view the full process . Also visit the Customer Before & After Gallery to view jobs completed with this system.
When to use an Aniline Restoration Kit
When a semi-opaque finish is desired
When there are greasy stains and you don’t mind if they are only subtly blended rather than fully covered
When you want to restore the original colour or one that is slightly darker than the original one
When you are up for a periodic refresh on high wear areas (say, every 1-3 years depending on the amount of use your lounge receives. Note: there are many factors that determine durability including the quality, condition, usage, UV exposure of the leather as well as the amount of coatings applied and quality of surface prep
The products
1) Spot & Prep (No.4) - Leather spot remover & surface prep
3 steps
1) Clean with prep solution
2) Apply stain
3) Apply colour cream
Optional: Apply Topcoat (No.7) for extra durability


Option 3: Transparent Dye Stain & Topcoat
For the lightest approach, re-stain the leather with Aniline Dye Stain (No.29). Transparent dye penetrates leather leaving vibrant, luminous colour (and no coatings). It also blends the appearance of marks and stains. Choose a colour that is similar to the darker areas to make stains less eye catching. As leather is a natural, fibrous material, the uptake of the dye may be somewhat variable resulting in either, subtle mottling which can look great or patchiness which may not look as good as you'd hoped. This method doesn't provide any coverage of marks or surface imperfections like scratches. Unlike paints, dyes are not self sealing. To manage the risk of dye transfer (which may or may not happen - it depends on your leather) and to provide extra protection to the leather, apply 2 coats of Topcoat (No.7) after dying (sold separately). This method is not suitable for use over leather filler. If your leather absorbs the dye stain unevely, you can choose to apply Colour Restoration Cream (No.32) for a more cohesive result (sold separately). This would effectively be like using the Aniline Restoration Kit.
When to use Aniline Dye Stain & Topcoat
When the leather is in very good condition; no repairs are needed, no major stains, original finish is intact (if any)
When you love the look of dyes and you'd prefer to see a few stains, scuffs and scratches more than use any paints.
The products
3 steps
1) Clean with prep solution
2) Apply stain
3) Seal and protect


A word about greasy stains
If the leather has darkened with an oily appearance, it may be greasy with hair and body oil that has penetrated throughout the leather. This can compromise both the strength and aesthetics of leather. Cleaning with Spot & Prep (No.4) removes grease from the surface but cannot fully reach the oils that are within the fibres. We have not yet found a DIY friendly, highly effective oil extractor.
Oils may prevent filler and glue from sticking, making repairs more challenging. Try inserting a few stitches using a curved upholstery needle and strong thread before gluing and filling. Recolouring greasy areas is possible, can produce pleasing results and can last well in some cases. However, it is also possible that the oils may resurface in time, disrupting the coatings. If that happens, the affected area can be retreated as needed.
Two-tone effects
Semi-aniline leathers are often finished with a softly mottled effect using 2 or more colours. Our kits contain one colour. For most DIY jobs, a single colour approach is best. That's because:
- no spray-gun is required
- costs are minimised
- the furniture doesn't need to be moved to a work-space for spraying
- no advanced techniques are used
That said, you can choose to apply a mottled effect with some artistic techniques (either by hand or by spray gun) using more than 1 colour. All colours are sold separately in a variey of sizes. Sample Pots can be useful for exploring your colour options.
Why topcoat? Which topcoat?
Topcoat (No.7) seals dyes, protects colour coatings and leather from abrasion and spills. It has high rub-resistence which extends durability. Leather Hero leather paint has a satin finish. For optimal results, the shine of your paint should align with the shine of your topcoat; eg, Matte topcoat over matte paint. To flatten the level of shine of your paint, use Dulling Agent (No.30).
Note: Most pigmented (Painted/coated) lounges have a satin finish. Some are glossy and very few are Matte or High Gloss. Older leathers tends to develop some shine due to the incidental burnishing of the leather and the use of waxy or oily conditioners. If you like shine, go for Gloss Topcoat. If you don't like shine, Satin Topcoat may meet your needs.
Matte Topcoat is very flat and is best applied by spray gun but can also be applied by hand.
When to use dulling agent
If you select Matte Topcoat, you may also need Dulling Agent (No.30). Add Dulling Agent to your paint to flatten the level of shine of the paint. If you are using Gloss or High Gloss topcoat, you will not need Dulling Agent. You can add 10% Topcoat to you last coat of paint to increase the level of shine. If you are using Satin topcoat, adding Dulling Agent is optional.