How to recolour leather
If the coatings on your pigmented (painted/coated) lounge, car seats, handbag or apparel are looking tired, stained, scuffed, delaminated and scratched or if you’d like to change the colour, this guide will help you choose the right products for the job and step you through the refinishing process. If you would like to permanently change your deteriorated and marked waxed or aniline leathers to pigmented, this is the system you need.
For the purposes of demonstrating the process, we will concentrate on refinishing (recolouring) a leather lounge. The same process applies to car leather and lots of other leather items.
5 steps
To recolour leather:
1) Clean with prep solution
2) Sand to key the surface
3) Apply primer
4) Apply thin coats of leather colour by sponge or spray-gun until coverage is achieved
5) Seal with protective leather topcoat
The products
To touch-up, repair, recolour, or change the colour of pigmented (painted/coated) leather, you'll need a Repair & Recolour Kit (products also available separately).
1) Spot & Prep (No.4) - Leather spot remover & surface prep
2) Sandpaper - 600-800 grit
3) Prime (No.5) - leather primer
4) Colour (No.6) - Leather paint
5) Topcoat (No.7) - Leather topcoat & sealer
If you select Matte Topcoat, you may also need Dulling Agent (No.30). For optimal results, the shine of your paint should align with the shine of your topcoat. Add Dulling Agent to your paint to flatten the level of shine of the paint. If you are using Gloss or High Gloss topcoat, you will not need Dulling Agent. If you are using Satin topcoat, adding Dulling Agent is optional.
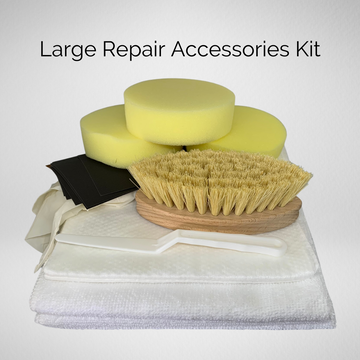
Accessories
- White microfibre cloths
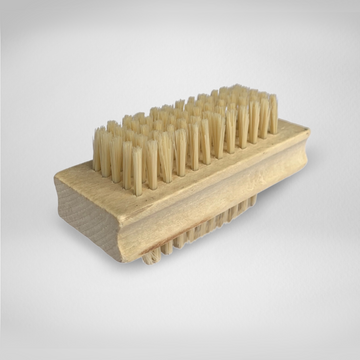
- Scrubbing brush
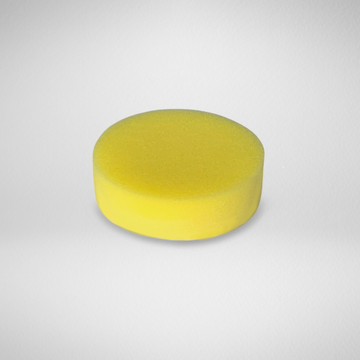
- Applicator sponges
- Sandpaper
- Drop sheets
Find accessories here.
THE REFINISHING PROCESS


CLEAN
Durable results start with a well prepped surface. Clean with Spot & Prep (No.4), cloth and brush to remove soiling, silicones, waxes, oils and emollients from the surface. Spray generously, scrub vigorously then wipe firmly with a cloth. Repeat if needed.


SAND
Sand with 600-800 grit sandpaper to smooth textural irregularities, remove any loose coatings, and key the surface for optimal adhesion. An electric palm sander can be used with appropriate care and caution. Complete any repairs now.


PRIME
Good coatings adhesion is important. Prime (No.5) is an adhesion promoter. It is a milky liquid that dries clear, is easy to apply and dries fast. Apply one coat all over. A second coat can be applied to high traffic zones.


COLOUR
Our tannery-grade leather paint is low viscosity. This renders a furniture-quality show-room finish. Apply by hand or by spray gun in thin coats, allowing drying between each coat. The number of coats needed is determined by the colour and the unique characteristics of your leather.


TOPCOAT
Two coats of clear topcoat seals and protects the colour coatings and the leather. Simply spray or sponge over the surface, allowing ample drying time between coats.
A sleek finish that hugs the grain
Delivering a beautiful, professional finish, our Repair & Recolour Kits let you refinish (recolour) over worn coatings to dramatically restore the look and feel of your leather.
In just a few hours or days (allowing for drying on big projects) and for a fraction of the cost of a new one, you can give your furniture or car seats a jaw-dropping makeover.
This system replicates the steps and products applied to pigmented leather during the manufacturing process. The finish is refined; not thick and chunky, and it won't rub off onto clothing.
It is dry in 2 days and cure in 14 days. Allow 14 days before applying Nourish (No.2) and Protect (No.3).

leather hero repair & recolour kit
For pigmented furniture, car seats, apparel and lots of other leather goods

Protect Your Work Area
If you are applying the products by a hand-rubbed technique; ie, by sponge, in most cases, you can work on the lounge right where it sits. Be sure to put down drop-sheets, move nearby furnishing and move the lounge away from walls. It’s best to work in good natural light and ventilation.
If you wish to spray the lounge using an air-compressor and spray gun, move the lounge to a suitable work area. Tape or cover any components that you do not wish to colour.
Take a set of before pics. They make a satisfying comparison when you are done. If you would like to help other customers find their colour, send them to us for display in our Customer Before & After Gallery.
Clean the surface thoroughly using a surface prep solution
Success happens from the bottom up. This cannot be stressed enough. Without good surface prep, coatings adhesion can be compromised. Vacuum to remove grit and hair then put on some gloves and working in one area at a time, spray Spot & Prep (No.4) onto the leather, scrub using a medium bristle brush and wipe clean with a microfibre cloth. Note: scrubbing is essential to most jobs. Simply wiping with a cloth may leave substances that repel the coatings or prevent adhesion. The aim is to remove soiling as well as any oils, waxes, emollients and silicones from the surface. Avoid household cleaners to avoid damaging the leather. Also, avoid using general-purpose leather cleaners that are not suitable for pre-colour surface prep.
Sand the surface
Allow a few minutes drying time then sand the entire surface using sandpaper in 600-800 grit. The aim is to lightly smooth any roughness, open the pores and key the surface to maximise the bond between the old coatings and the new. You don’t need to remove the old coatings. Use a damp cloth to wipe away any loose particles. Note that vinyl and faux leather generally cannot be sanded.
Repair as needed
If your lounge doesn’t need any repairs, move on to Step 5.
Use leather glue to bond loose tags and re-join cut edges etc. Allow drying time then sand to smooth. If there are pits, scratches and cracks present, apply leather filler in thin layers to fill any surface imperfections. Allow drying between each layer. Once cured, use sandpaper to smooth the repaired area. This is the slowest stage of the project. Be patient as the results are worth it. Around 10% leather paint can be mixed into white filler to create a tinted filler.
Often the tops of seat cushions are more heavily worn than other parts of the lounge. The leather may be delaminating, flaking and showing a heavy patina of surface wear. Leather Binder is a viscous, wipe on resin that coats minor pitting and surface irregularities whilst adding surface structure to weakened and strained leather. It dries quickly, can be texturized and sanded. Applied in layers, it can improve the texture and finish of worn lounge seats. Leather Binder is sold separately as it’s not needed in every circumstance.
Apply leather primer
At this point, surface prep is complete and you are ready to commence the colouring process. Primer is a clear coating that promotes adhesion thereby optimising the bond of the colour coats. It is easy to apply, dries quickly and is self-levelling. It’s a good idea to familiarise yourself with the handling of the products by starting on the back or sides. However, your main priority is the seat cushions and armrests so ensure you reserve ample product for the main areas. Apply primer to a sponge and wipe over the surface in long even strokes until all areas are coated. Allow drying. If your leather is quite porous, you may apply a second coat.
…Between the Cushions…
Leather finishing products are designed to stick, so they will stick if pressed together whilst drying. When finishing areas where leather touches leather; ie, between seat and backrest cushions, engage a helper to hold the cushions apart whilst painting then drying off with a hairdryer.
Apply leather paint
Wearing gloves, shake the colour, then squeeze some leather paint onto a sponge. Apply to a small area at the back to get a feel for the product and how it handles on your leather then do a test panel or start on the front. Apply to one area at a time using long even strokes ensuring even coverage. Use moderate pressure to press the first coat into the grain and crevices. Wipe the colour into the seams then wipe again to remove any excess.
Don’t try to achieve a perfect finish with your first coat. Multiple thin coats give the best results. Dry each layer with a hairdryer or allow an hour or two drying time between coats. Some colours are more opaque than others so the number of coats needed can vary. If you are refreshing the original colour, fewer coats may be needed whilst a colour change may require more – 3 to 8 coats are typical.
Apply leather topcoat
Improving wear properties, 2 thin coats of topcoat finishes your project. Apply by sponge in long even strokes ensuring even coverage. Most furniture has a Satin finish. Note that Matte finish is best applied by spray if possible. If not, shake the bottle often whilst applying.
Well done! You have fully refinished your lounge.
Drying time & After care
Coatings are touch dry in 1 hour, dry in 2 days and cured in 14 days. Allow at least 2 days before using and wait for complete drying before wiping with water or applying products.
Good leather includes a 3 monthly clean, condition and protection treatment. Your leather is coated so you have the choice of 2 care kits (products also available separately):
- Leathe Care Kit - this kit is the first choice for your type of leather. It contains a maintenance strength cleaner, conditioner and protector that has anti-soiling effects, makes cleaning easier and contains a UV barrier.
- Waxy Care Kit - Choose this kit if you have a particular requirement for a conditioner with lots of shine or the most matte option available.
Now it's your turn
Recolour your leather with this kit
Available in 85 colours, 6 sizes and dozens of combinations.


Leather Repair & Recolour Kit - Aniline Chesterfield
- Description
- Tab
- Info
A pro-grade repair and refinishing system for pigmented (painted/coated) leathers.
This best seller is the one you need if you want to cosmetically repair surface damage such as scratches, holes, pet damage, rips, scuffs, cracks, and general wear and tear. It's also the kit you need if you want to correct colour problems like stains and discolouration. Use the same colour or change it up with a new one. Apply by hand with a sponge or use a spray gun. No special experience needed.
For sofas, cars, apparel, bags and lots of other leather
Calling all DIYers. You'll love the professional results you can achieve with this premium leather repair and recolour kit. From small touch-ups in your car to changing the colour of an occasional chair or recolouring an entire lounge suite, this kit enables showroom results.
A tannery grade system
Our refinishing system is the real deal. It echoes the process used on your pigmented leather in the tannery. No compromising shortcuts, it includes primer for maximum adhesion (a key durability factor), professional grade leather paint plus a separate bottle of performance tested clear topcoat. By using the same layering process as the original manufacturer, a beautiful, wear-resistant transformation is possible. It's flexible and self-sealing which means that it won't rub off onto your clothes.
Customise your kit
Customise your kit by selecting the size you need, the colour you like and the level of shine in your topcoat. You can also add glue and white leather filler (can be tinted with your leather paint) to your kit if your job has surface imperfections and cosmetic bingles that need to be repaired before doing the colour work. (Selected combinations).
Colour & sheen
The leather paint has a satin finish so it suits most cars and furnishings. You can make it flatter by adding Dulling Agent (No.30) or increase the shine by using Topcoat Gloss or High Gloss. Offering full coverage, it's possible to cover the old coatings with the same, similar or different colour.
Get ready to take a bow to the tune of applause from your family and friends.
Want to know more about the products? Read through the info on this page then head to the How To library to learn more about choosing your colour and topcoat and how to use the products.
Need accessories for your job? Here they are.
Want to see what other customers have done with this kit? Head to the Customer Before & After gallery.
Instructions: Print the Directions for Use, Tips and Details ![]()
This content type will accept rich text to help with adding styles and links to additional pages or content. Use this to add supplementary information to help your buyers.
You can use product metafields to assign content to this tab that is unique to an individual product. Use tabs to highlight unique features, sizing information, or other sales information.
More information
Further detailed Directions for Use are available on the product pages for kits and for the individual products: